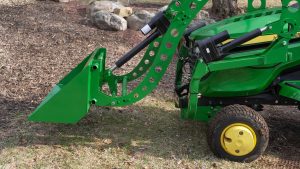

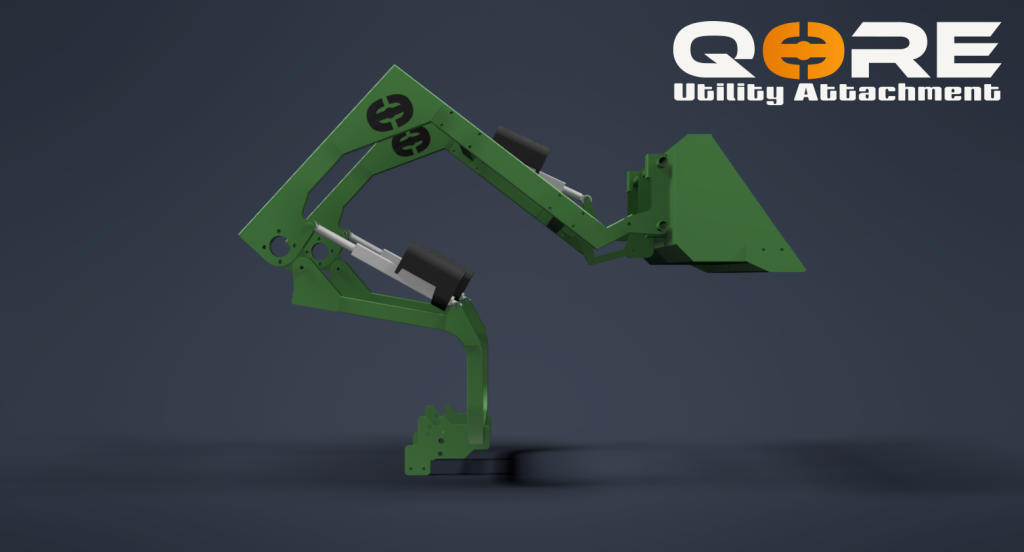
Look, we have all been there, wondering how to install a front-end loader on a lawn tractor so we don’t have to break our backs moving dirt. You wake up on a Sunday with a screaming lower back because you spent Saturday pushing a rusty wheelbarrow full of wet topsoil across your yard. It is exhausting, frustrating, and honestly, a terrible way to spend your weekend when you have a mower sitting right there.
You probably stare at that riding mower parked in your garage and wonder if it could do a whole lot more than just cut grass on Saturdays. Well, bolting on some heavy steel and tapping into auxiliary hydraulic power is the exact solution you have been desperately looking for. It fundamentally changes the way you approach heavy chores.
Modifying your mower completely transforms your property maintenance and hands you your weekends back. Here is exactly how to turn that basic summer machine into a year-round, earth-moving powerhouse that finally works as hard as you do.
Before you even think about ordering heavy parts or spinning a wrench, we need to have an honest talk about the machine you currently own. Slapping a heavy steel bucket onto a cheap, big-box store mower is a guaranteed recipe for a snapped front axle. You need a garden tractor that has a fully welded steel frame and a cast-iron front axle to handle the stress. A heavy-duty lawn tractor front-end loader kit installation is only going to be successful if your machine is rated for ground-engaging attachments.
A lot of guys think engine horsepower is the most important factor, but that is a total myth when it comes to heavy loader work. Your tractor’s transaxle strength and frame rigidity matter way more than the shiny sticker on the engine hood. If your machine is built from the factory to handle heavy snowblowers or rear-tine tillers, it generally has the guts for this kind of work. Take an afternoon to crawl underneath the machine and inspect the main frame rails for any existing stress cracks or heavy rust.
If you know how to lay down a perfect MIG weld and understand hydraulic fluid dynamics, building from scratch is pretty tempting for a garage guy. Fabricating a DIY front-end loader for a lawn tractor lets you customize the bucket width and arm geometry exactly how you want them.
But let’s be real, sourcing raw steel, surplus hydraulic pumps, and bending your own hardlines takes an unbelievable amount of free time. You will likely spend your entire winter out in the shop fighting with warped metal and leaking fittings if your math is slightly off.
When you buy a package from a reputable manufacturer, all the mind-numbing structural math has already been done for you by professional engineers. The laser-cut steel sub-frame is guaranteed to match up directly with the factory holes already drilled in your specific tractor model. You are essentially paying for convenience and safety, which means the arms won’t bind up and the bucket will actually sit totally flat. It turns a fabrication nightmare into a totally manageable weekend project that you can tackle with basic hand tools.
You really do not want to start pulling heavy parts out of the wooden shipping crates if you only own a flimsy plastic toolkit. You are going to be tightening serious structural bolts under the chassis, so you need tools that will not strip or break under pressure. Having the right gear laid out on your workbench saves you hours of frustration and busted knuckles.
Here is a quick list of what you need to have sitting ready in the shop:
Alright, let’s clear off the workbench, turn up the radio, and get down to the actual physical mechanics of the project. You need a flat, solid concrete floor because trying to align heavy steel brackets on a loose gravel driveway is completely miserable. Make sure you unhook the battery negative terminal and securely chock the rear drive wheels so the machine does not roll.
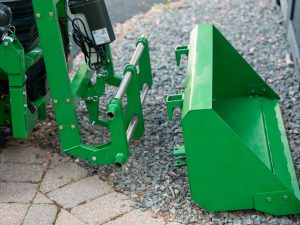
The sub-frame is basically the spine of your new loader, safely transferring all that lifting weight across the entire length of the chassis. Slide the heavy brackets under the tractor and use a low-profile floor jack to carefully lift everything up into position. Thread all the provided grade-8 bolts by hand first, leaving them slightly loose until you get everything lined up perfectly.
Your factory engine needs to physically drive the new hydraulic pump, usually running off the front electric PTO clutch pulley. Bolt the heavy steel pump bracket directly to the front of the frame and get the main drive belt routed around the pulleys. Getting the belt tension right is an absolute make-or-break moment; too loose, and it slips, too tight, and you burn the bearings.
Mount your joystick control valve onto the steering column bracket right where it feels totally natural for your right hand to rest. Now you have to carefully route the thick, stubborn rubber hoses from the pump, up to the valve, and out to the lift cylinders. Keep those high-pressure lines far away from the hot exhaust pipe and make sure they do not pinch when you turn the steering wheel.
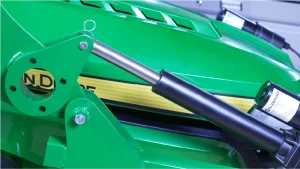
This is the exact moment where you will definitely want to bribe a buddy with a cold drink to help you lift some heavy steel. Hoist the main boom arms into the sub-frame receivers and hammer the steel pivot pins straight through the aligned holes. Lock them in place immediately with the provided lynchpins, then repeat the same process to mount the bucket on the front.
Fill up your main reservoir completely with fresh hydraulic oil, start the tractor engine, and get ready for some really weird noises. Move the joystick around very slowly to push fluid through the dry lines and bleed out all the trapped air bubbles. The pump will probably whine loudly, and the arms will jerk violently at first, but it will smooth out perfectly after a few cycles.
Once you get the base sub-frame bolted on and the hydraulics flowing nicely, you have essentially built a universal power unit. You do not just have to move dirt anymore; you can quickly pull a couple of steel pins and totally swap out the front tool. Taking a look through a solid small tractor attachments guide will totally blow your mind regarding what these machines can actually accomplish.
You can grab clamp-on pallet forks for easily moving heavy stacked lumber or attach a dedicated grapple to tear through thick, nasty brush. When the brutal December weather rolls around, you can drop the dirt bucket entirely and pin on a snow pusher blade instead. The beauty of this modular setup is that it stops your expensive mower from sitting totally idle for six months out of the year.
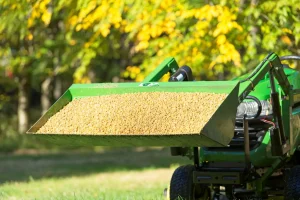
We see guys skip this crucial step all the time because they get excited to start digging, and it is flat-out dangerous. When you lift a bucket completely full of wet gravel, the machine’s center of gravity violently shifts straight to the front axle. If you do not have enough heavy counterweight on the back, your rear drive tires will lift straight off the ground, and you will flip.
You have to fill the rear tires with heavy liquid ballast, bolt on cast-iron wheel weights, and hang a loaded box off the back hitch. As a general rule of thumb for these setups, whatever weight your loader is capable of lifting, you need that exact amount of weight anchoring the rear end. Never, ever attempt to carry a heavy load out front without your rear ballast securely locked into place.
Building the machine in the garage is honestly only half the battle; keeping it running smoothly takes some highly dedicated habits. A lot of people completely ignore routine maintenance until a hydraulic line blows out and sprays hot oil all over their freshly cut grass. We have learned some hard lawn tractor modification tips over the years that will definitely save you from expensive repair bills down the road.
Treat the equipment with a little bit of respect, and it will easily give you a decade of flawless performance without breaking a sweat. Never treat this setup like a commercial bulldozer; it is made strictly for scooping loose dirt, not ramming into solid oak stumps at full speed.
Here are a few more iron-clad habits you need to adopt to keep things running exactly right:
Q: Will adding a front loader completely void my factory warranty?
A: Yeah, almost certainly. Bolting heavy steel directly to the frame and physically tapping into the power system usually voids standard manufacturer warranties, so check your paperwork first.
Q: How much weight can these aftermarket loader setups actually lift?
A: It heavily depends on your specific tractor’s footprint, but a good kit on a heavy-duty machine can safely lift anywhere from 300 to 500 pounds.
Q: Do I have to upgrade my front tires for this to work?
A: It is highly recommended for safety. Factory turf tires are way too thin and will compress or physically roll off the rim under heavy bucket loads.
Q: Can I safely run the loader while the mower deck is still attached?
A: You physically can on most models, but you really shouldn’t. The deck gets in the way of ground clearance, and you risk smashing it into hidden rocks.
Q: Is hydraulic fluid terribly expensive to replace every year?
A: It is not exactly cheap, but you only need to completely change the main system fluid every few years if you keep the filters clean.
Pulling the trigger on a hydraulic loader upgrade is seriously one of the best financial investments you can make for your property. It takes those brutal, back-breaking tasks that ruin your weekend and turns them into fun projects you actually want to tackle from the driver’s seat. If you take your time out in the garage, respect the structural limits of the machinery, and stay diligent with the grease gun, you will build a rock-solid rig.
Just remember that personal safety always has to come first, so never skip installing the heavy rear ballast and always keep your loads low to the ground. If you are tired of doing things the hard way and want to see what your machine is really capable of, swing by LGM USA for the exact guidance and professional tools you need to finish the job right.

© 2026 All Rights Reserved | LGM USA LLC
Added to cart
Check out our shop to see what's available