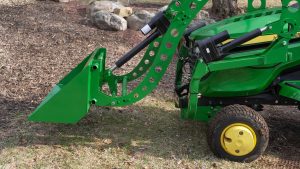


Equipping a John Deere X300 or X500 with a capable front-end loader dramatically increases what the tractor can handle—whether it’s landscaping, seasonal maintenance, or daily material handling. The LGM-100 is engineered specifically for this purpose: a compact yet robust electric loader designed to deliver dependable lifting power without the complexity of hydraulic systems.
This guide provides a professional, step-by-step installation overview, along with technical notes, operational expectations, and maintenance insights. The objective is to help users complete a clean, safe, and efficient installation that allows the loader to perform to its full capability.
The LGM-100 is an electric front-end loader built for John Deere X300 and X500 lawn and garden tractors manufactured from 2007 through 2025. It provides an accessible and reliable method of upgrading a standard mower-tractor into a multi-purpose work machine.
Core Specifications
The LGM-100 is built for homeowners who require professional-level lifting capability without investing in a dedicated compact utility loader. Because it is electrically powered, it eliminates the biggest maintenance burden typical of small loaders—hydraulic fluid systems.
Before you begin, it is important to prepare both the workspace and the tractor. A clean and controlled environment reduces installation errors and ensures that all components align correctly.
Recommended Tools
Pre-Installation Checks
The frame acts as the primary support structure for the loader arms, actuator, and bucket. Proper alignment is essential for stable lifting performance.
Procedure
Professional Tip
Do not use power tools for initial tightening. Precise alignment ensures the actuator and loader arms operate smoothly under load.
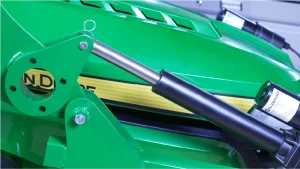
The electric lift actuator is the heart of the LGM-100. This system replaces hydraulic cylinders, offering smooth, predictable operation with far less maintenance.
Procedure
Professional Tip
Avoid placing wiring near the muffler, exhaust manifold, or rotating pulleys. Heat and abrasion reduce long-term electrical reliability.
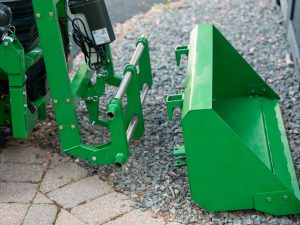
The 42-inch bucket is designed for general-purpose residential material handling: soil, stone, mulch, snow, compost, and debris.
Procedure
Professional Tip
A light application of grease on the hinge points reduces friction and prolongs the life of the bushings.
Once all components are mounted and loosely fitted, it is time to activate the electrical system.
Procedure
Expected Performance
The loader typically raises to its full 44-inch height in approximately seven seconds. The actuator provides consistent speed regardless of load (within rated limits).
After confirming that the loader operates correctly, complete the final tightening of all hardware.
Procedure
Professional Tip
Perform a re-torque after the first three hours of use. New installations often settle slightly under operational load.
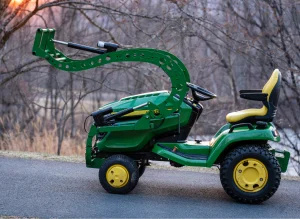
Once installed, the LGM-100 transforms a standard lawn tractor into a versatile work tool.
Operating Recommendations
Skill-Building Practice
Before tackling an intensive project, use test materials such as sand or mulch to familiarize yourself with:
The LGM-100 has become a popular upgrade for John Deere X-series owners because it strikes a balance between performance, ease of installation, and minimal upkeep.
Key Advantages
Users rely on it for:
Variable-Speed Joystick Control
The optional joystick provides dynamic speed adjustment. This is especially helpful for:
The control feels natural and improves overall operator comfort.
The electric design significantly reduces maintenance requirements. However, consistent care ensures optimal longevity.
Maintenance Guidelines
What to Avoid
The LGM-100 offers a straightforward pathway to significantly boost the capability of a John Deere X300 or X500 tractor. Its clean electric system, durable construction, and user-friendly installation make it a practical upgrade for homeowners and property managers looking to expand what their tractor can accomplish.
With careful installation, proper operation, and regular maintenance, the loader becomes a reliable tool for everything from seasonal tasks to larger landscaping projects. The transformation is immediate—turning a conventional mower tractor into a versatile machine that handles material work with ease and precision.
Ans. Yes. It is compatible with X300 and X500 series models manufactured from 2007 through 2025, including X350R, X370, X380, X390, X570, X580, X590, and others. For certainty, consult your model’s owner manual or confirm compatibility directly.
Q. How difficult is installation?
Ans. Installation is straightforward for anyone familiar with basic hand tools. Because the system is electric and bolt-on, no hydraulic work is required. Most users complete installation within two hours.
Q. Does the LGM-100 rely on hydraulics?
Ans. No. It uses a 12-volt electric linear actuator, eliminating common hydraulic issues such as leaks, pressure fluctuations, and pump failures. The electric system delivers smooth, reliable lifting.
Q. What maintenance does the loader require?
Ans. Maintenance is minimal. Keep the pivots lubricated, inspect wiring periodically, and tighten hardware as needed. There are no hydraulic fluids to replace or bleed.
Q. What can the loader be used for?
Ans. The LGM-100 is suitable for moving soil, mulch, gravel, sand, snow, compost, and firewood. It is also effective for driveway maintenance, small-scale grading, garden bed preparation, and debris removal.


© 2026 All Rights Reserved | LGM USA LLC
Added to cart
Check out our shop to see what's available