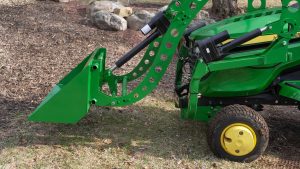
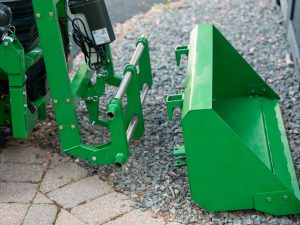
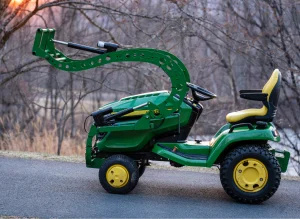
Installing a front-end loader on your John Deere tractor transforms a standard lawn and garden machine into a highly capable utility asset. The LGM-100—engineered specifically for John Deere X300 and X500 series tractors—delivers electric-powered lifting, durable construction, and dependable performance for homeowners and property managers. Whether you’re reshaping garden beds, hauling gravel, clearing brush, or moving debris, this guide walks you through every stage of the process—from unboxing to the first full-capacity lift.
1.Familiarize Yourself
Understand the components and operating specifications of the LGM-100.
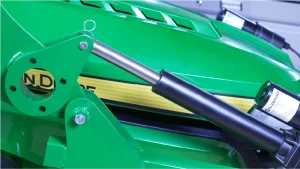
The LGM-100 is an electric front-end loader constructed from high-strength carbon steel and engineered to fit John Deere X300 and X500 tractors (model years 2007–2025). Its linear electric actuators deliver smooth, controlled motion comparable to hydraulic systems while eliminating the complexity of pumps and fluid lines.
Key performance details:
- Peak lift capacity: 350 lb
- Maximum lift height: 44 in
- Bucket volume: 3 cu ft
- Approximate loader weight: 180 lb
Since the system runs strictly on the tractor’s 12-volt battery, installation is significantly simpler than hydraulic alternatives. The design delivers professional-grade lifting without exceeding the tractor’s structural limits.
2. Prep & Safety First
Choose a stable, level workspace—such as a driveway or clean garage floor—and gather the following tools:
- Standard hand tools: ratchet, wrenches, pliers
- Torque wrench (for accurate bolt tightening)
- Safety gloves and protective eyewear
- Your John Deere owner’s manual for reference points and factory access points
Always disconnect the tractor’s battery before beginning any wiring work. If you’re new to front-end attachments, review the LGM-100 installation manual to confirm torque values, part identification, and wiring diagrams specific to your tractor model.
3.Unbox & Inventory
Carefully open the LGM-100 packaging and confirm that all components are included:
- Loader frame and lift arms
- Bucket assembly
- X300/X500-specific mounting brackets
- Wiring harness
- Joystick or rocker-switch control kit (depending on your selected package)
- Linear electric actuators
- Hardware kit (fasteners, pins, washers, spacers)
- Installation and safety guide
Lay out all components and match them to the included checklist. Minor scuffs from shipping are typically cosmetic, but any damage to wiring, actuators, or frame components should be reported immediately.
4.Install the Mounting Brackets
These brackets form the structural base of the loader.
- Park the tractor on level ground and engage the parking brake.
- Remove the front bumper or grille guard if your model includes one.
- Position the LGM-100 brackets using the factory-drilled holes on the tractor frame.
- Insert the bolts and tighten them lightly. Do not torque them fully yet.
- Set the loader frame into the bracket sockets to confirm a proper fit.
- Once alignment is perfect, torque all hardware according to the values listed in the LGM-100 manual.
Accurate bracket alignment ensures safe lifting performance and prevents long-term wear on pivot points.
5.Assemble the Loader Frame & Bucket
With the brackets secure, begin fitting the main loader structure.
- With assistance (recommended), lift the loader frame and seat it into the brackets.
- Insert the pivot pins or bolts and lock them with the supplied nuts or cotter pins.
- Attach the bucket using the hinge pins included in the kit.
- Manually tilt the bucket to verify smooth travel, then engage the actuators.
Movement should feel consistent and unrestricted. If you encounter binding, make minor alignment adjustments and apply a light coat of machine grease to all pivot surfaces.
6.Electrical Setup
The LGM-100’s electric actuation simplifies installation and long-term maintenance.
- Connect the wiring harness to the tractor battery: red to positive, black to negative.
- Route the harness neatly along the tractor frame, keeping it clear of heat sources and moving components. Secure with zip ties.
- Match the actuator leads to the corresponding harness connectors.
- Mount the joystick or rocker switch at an accessible location near the dash or steering wheel.
- Plug the control unit into the harness and ensure all terminals are insulated and fully seated.
Before reconnecting the battery, inspect the full wiring path for exposed wire, loose connections, or potential abrasion points. Once everything checks out, reconnect the battery.
7.Functional Test
Confirm proper operation before the first job.
- With the tractor running or the electrical system active, test the joystick or switch.
- Raise and lower the loader slowly to confirm consistent actuator movement.
- Test the bucket’s tilt function to ensure full, even travel.
- Listen for irregular sounds such as grinding, clicking, or actuator hesitation.
In upgraded ball-screw configurations, a full-height lift under load takes roughly 7 seconds; standard models achieve full height in approximately 14 seconds. If lift speed feels reduced, verify the battery charge and review wiring connections.
Ballasting & Stability
Proper ballast enhances traction and ensures stable operation while lifting heavy material.
- Rear wheel weights
- Weighted rear attachments
- Tire fill (water or air, depending on your environment and equipment)
After ballasting, conduct a short test drive. Move forward, reverse, and lift a moderate load to confirm balanced handling and consistent traction.
First-Use Best Practices
Your first operating session should focus on control and familiarity.
- Begin on a flat, open surface.
- Engage the joystick gently to feel the loader’s response.
- Start with small movements—raise the bucket a few inches, lower it, and practice tilting.
- Once comfortable, scoop a light material such as soil or mulch and practice dumping at different heights.
While the LGM-100 is capable of lifting up to 350 lb, mastering precise control is more important than testing maximum load on your first run. Avoid abrupt movements until you understand the joystick sensitivity and actuator response.
The electric system offers significant benefits over hydraulic options: quieter operation, immediate responsiveness, and predictable motion at both high and low throttle.
Maintenance & Support
Regular upkeep ensures long service life and consistent performance.
- Clean the loader after each use—rinse debris and wipe actuator shafts to keep contaminants away from seals.
- Lubricate all pivot joints every 10–15 operating hours with light lithium grease.
- Inspect fasteners monthly; natural vibration may loosen hardware.
- Examine the wiring harness for wear, rubbing, or loose connectors and re-secure as necessary.
- Store the attachment indoors or under shelter to preserve the powder-coated finish and prevent moisture exposure.
The LGM-100 includes a comprehensive warranty and support network dedicated to troubleshooting, replacement parts, and performance guidance. Keep your serial number and receipt accessible for streamlined service.